Choose Nylas Mail as the default mail client on Windows
[Important Note: These instructions only apply to the latest versions of Nylas Mail.]
Run Nylas Mail and click the menu in the top right to visit Preferences.
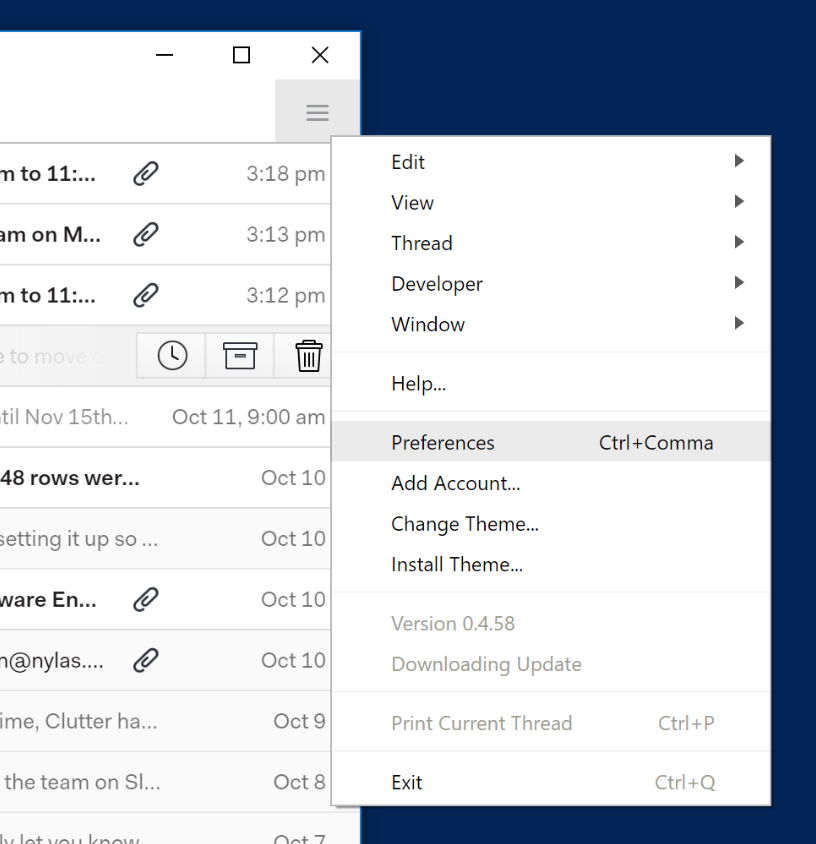
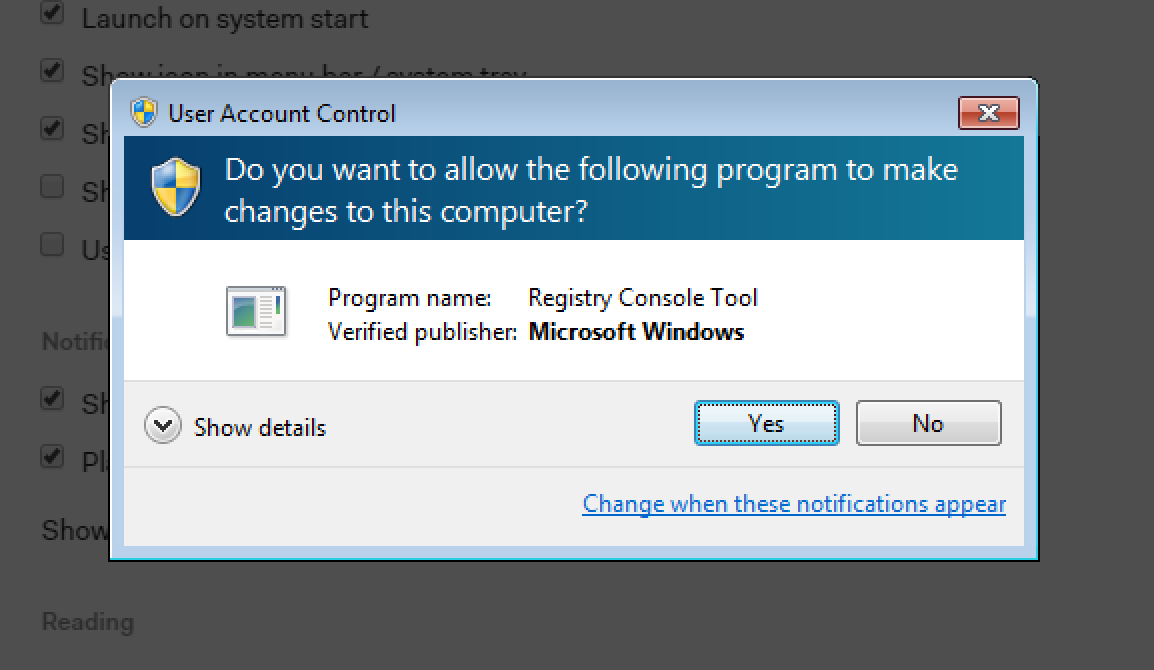
Under the General tab, click "Use Nylas as the default mail client." If you're using Windows 7, you need to click "Yes" in the UAC dialog that appears. If you're using Windows 8 or Windows 10, follow the additional instructions listed below.

Additional Steps for Windows 10:
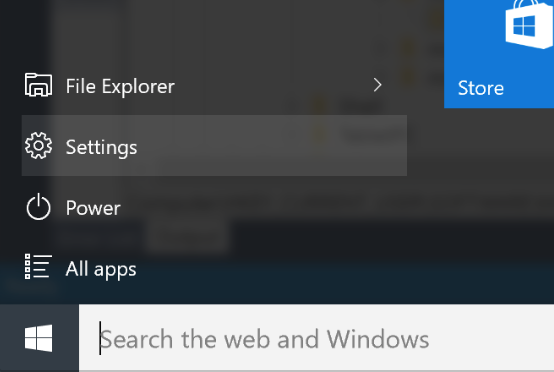
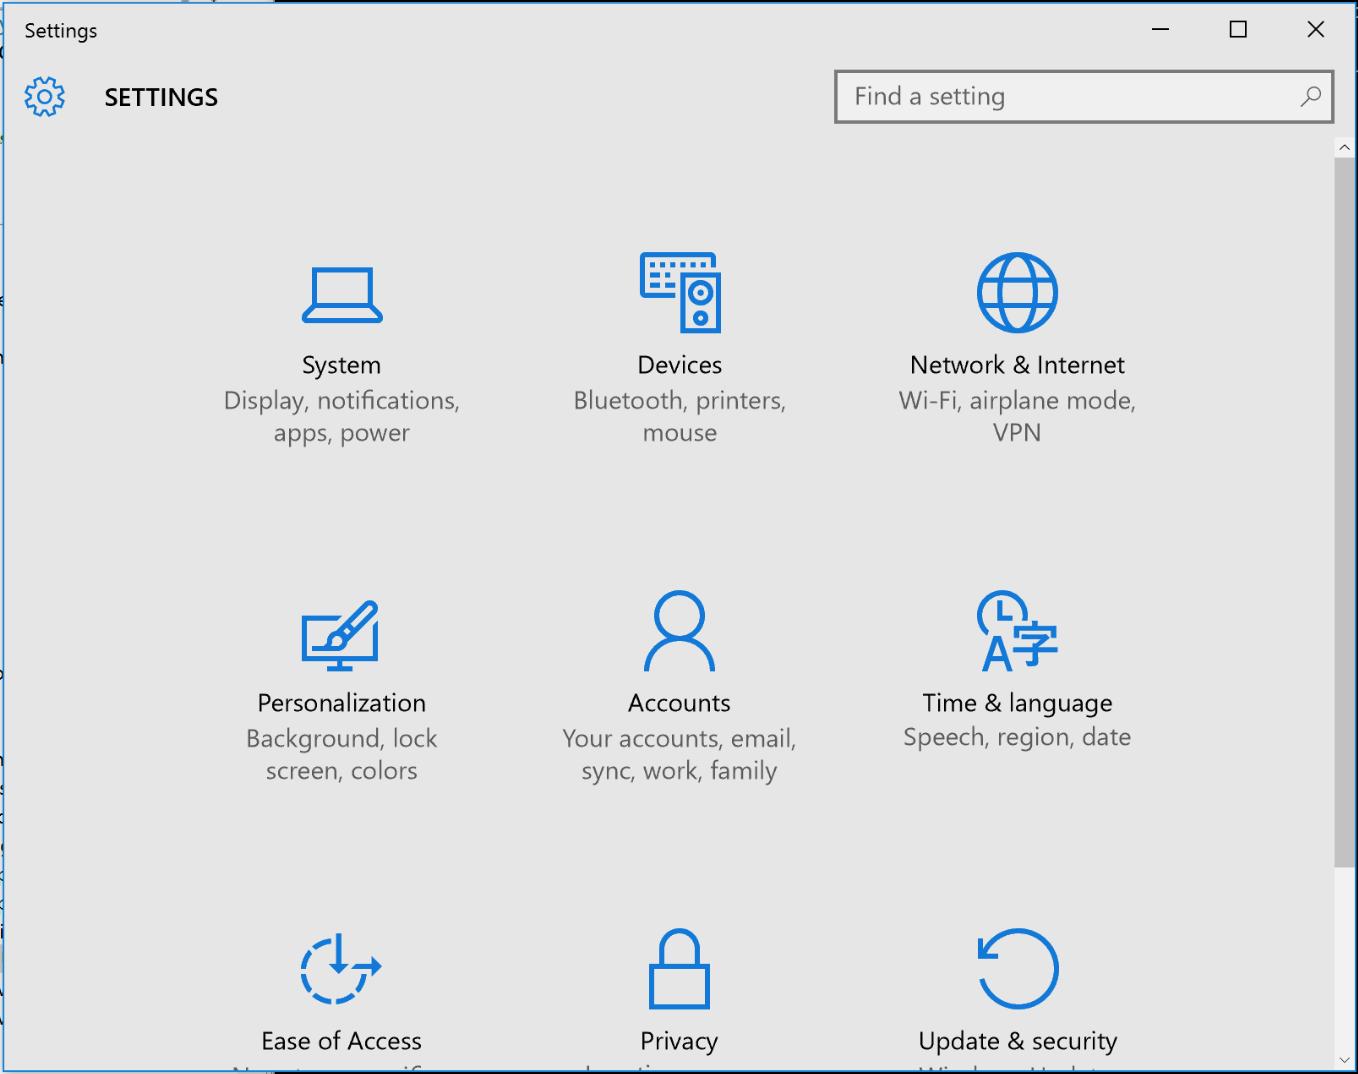
After following the steps above in Nylas Mail, from the Start menu, choose "Settings":
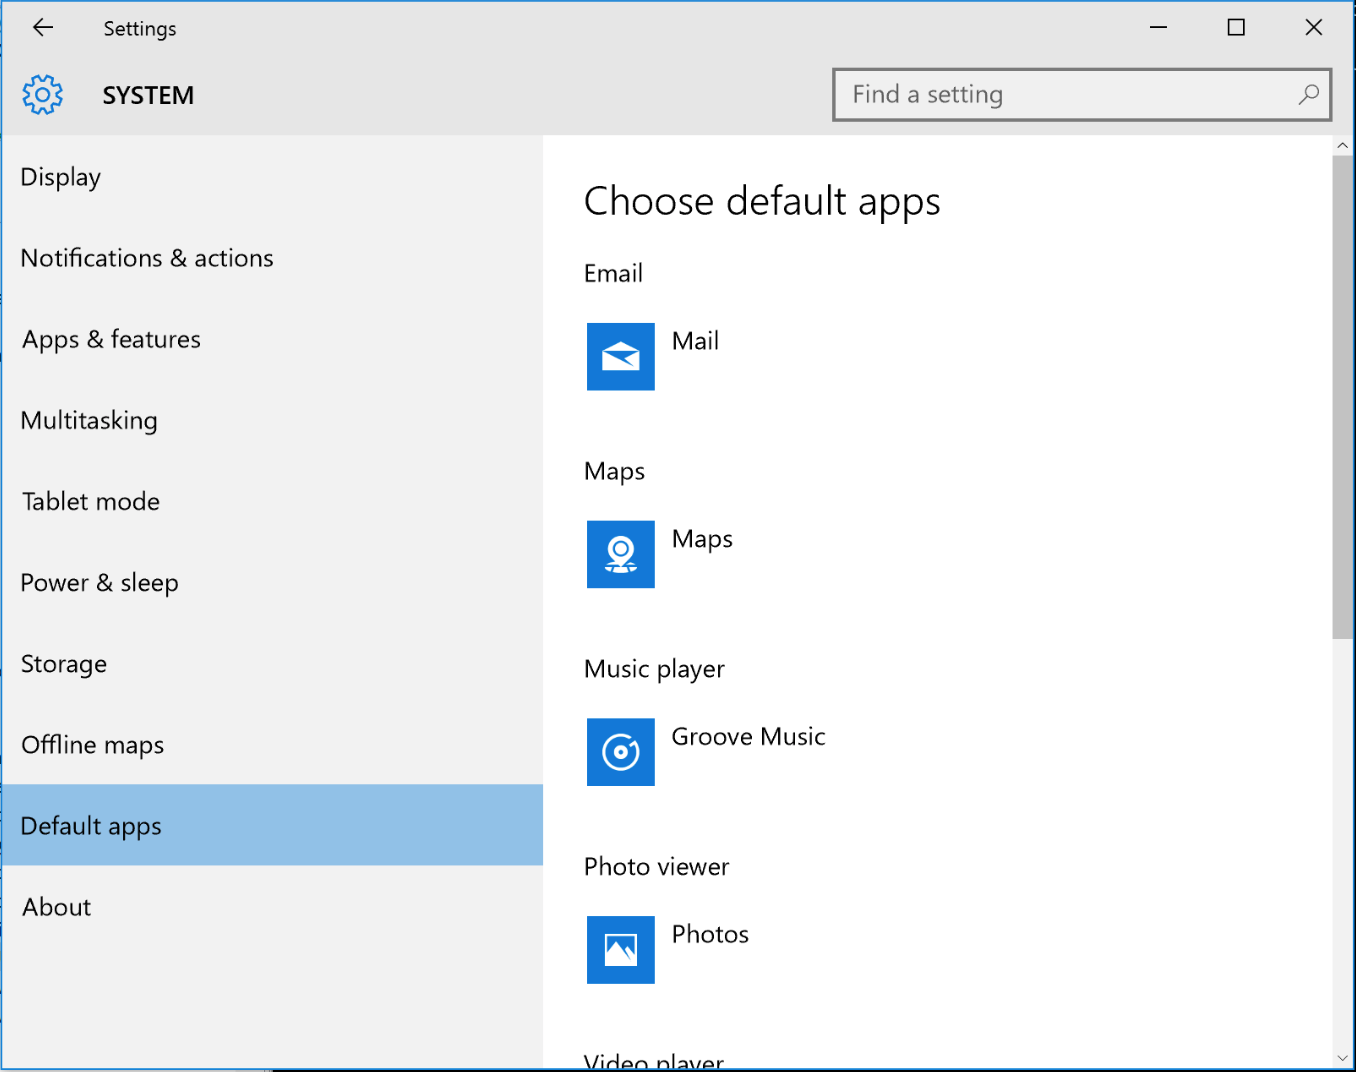
Click "System" to go to system settings. Then choose "Default Apps" from the sidebar:
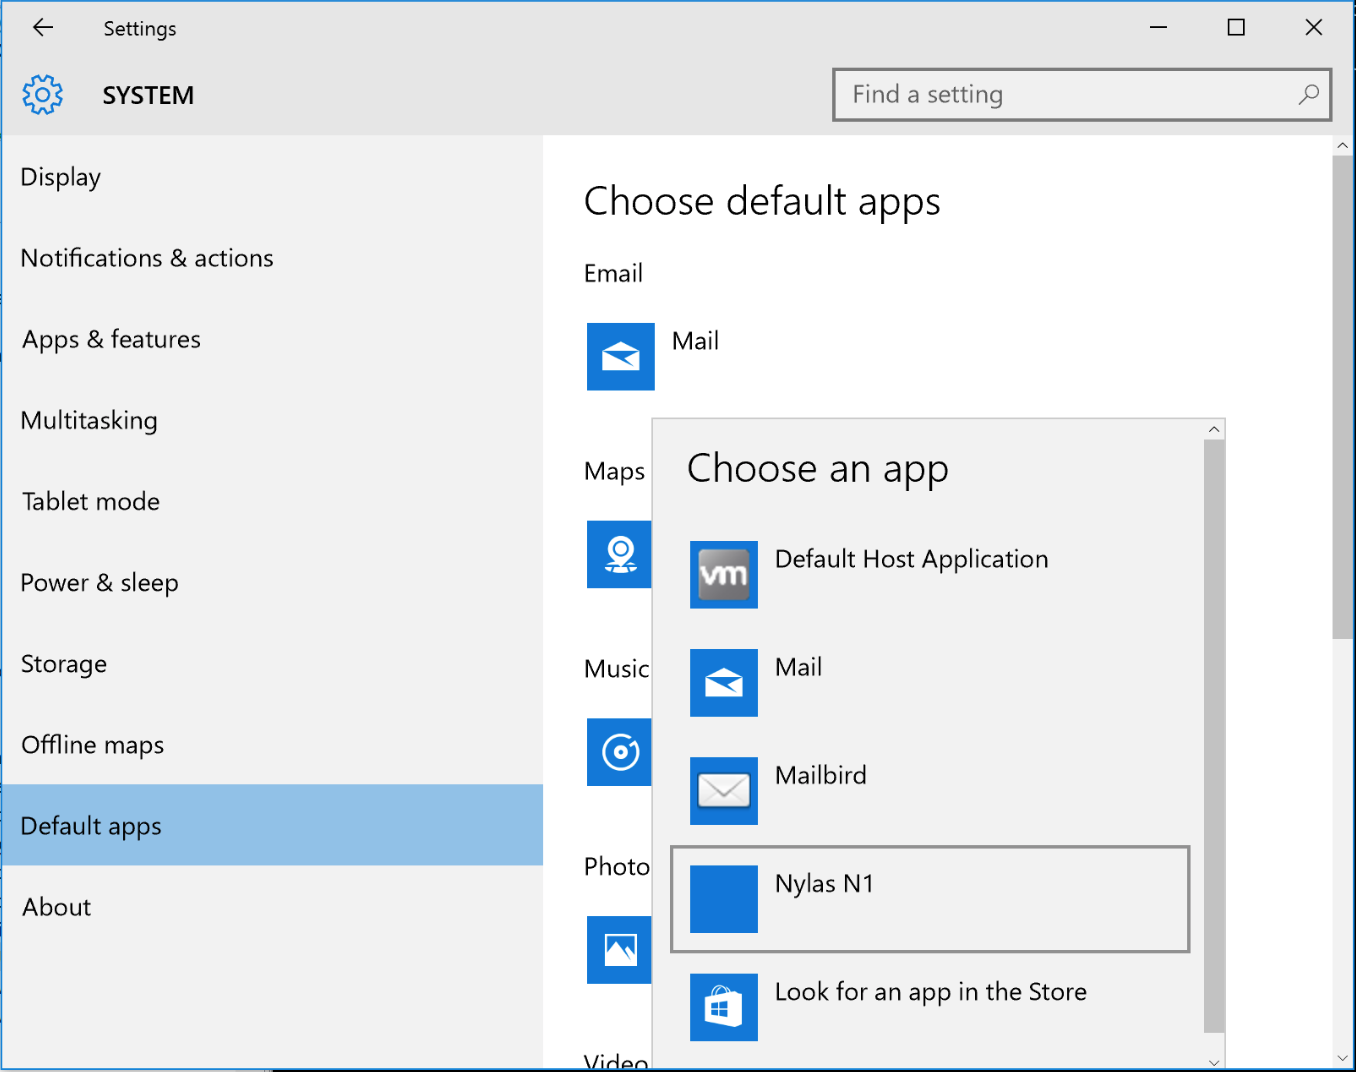
Additional Steps for Windows 8:
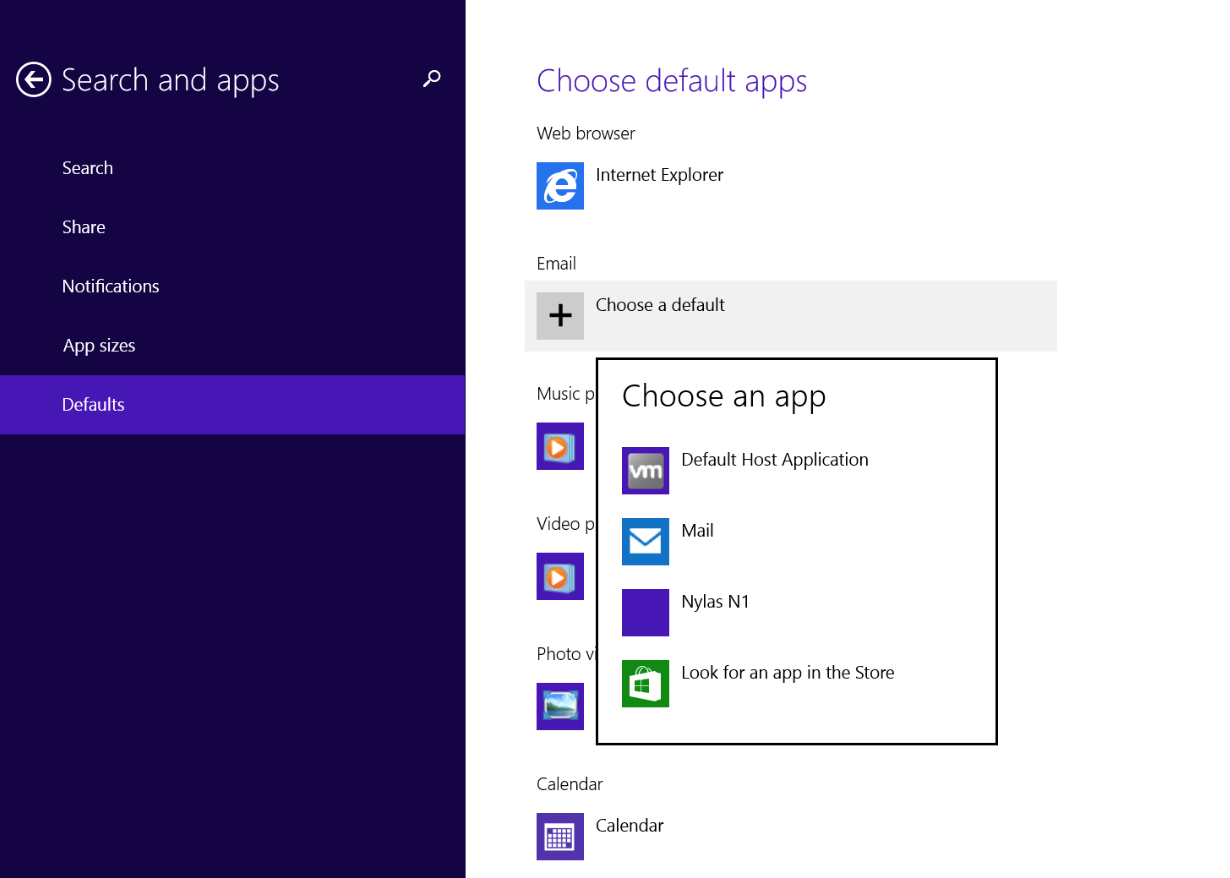
After following the instructions above in Nylas Mail choose "Settings" from the Start Menu. Then click "Search and Apps":
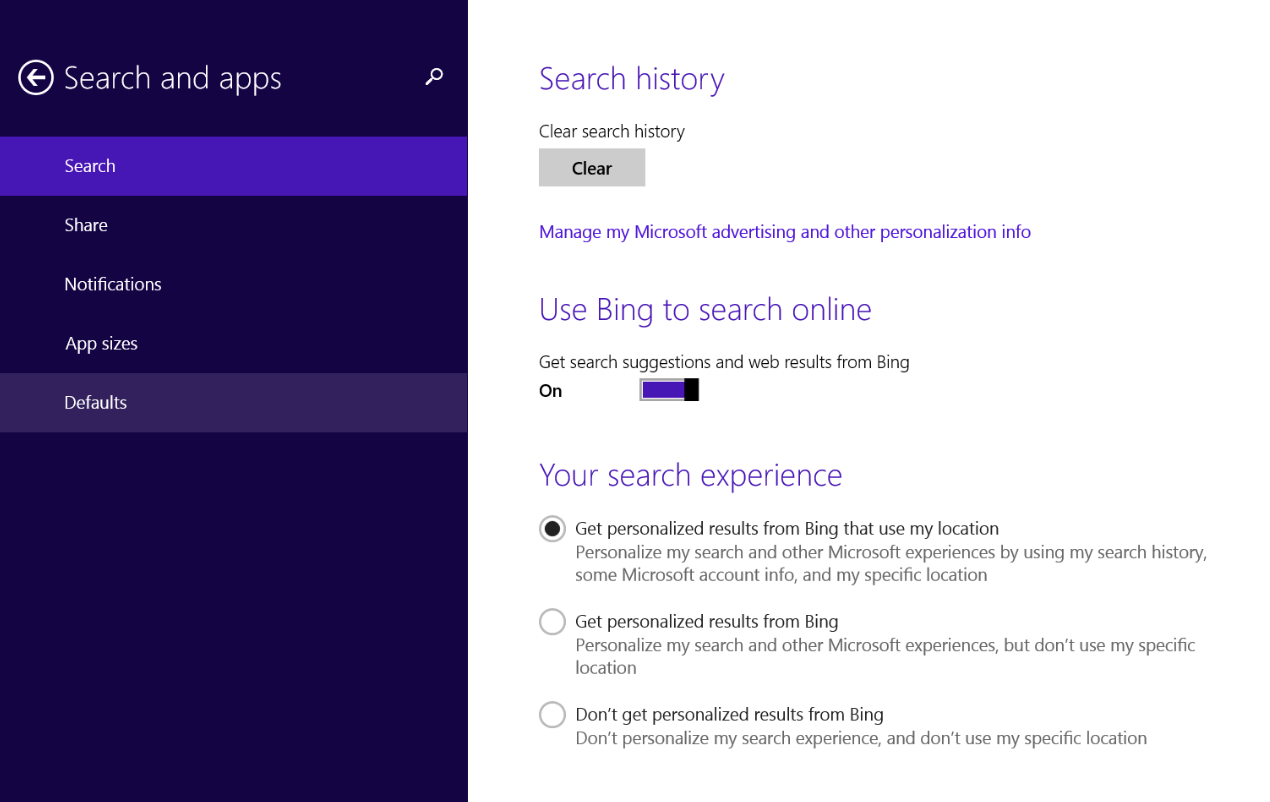
From the left sidebar, click "Defaults". Click "Email" and choose "Nylas N1" from the list.
Windows 7:
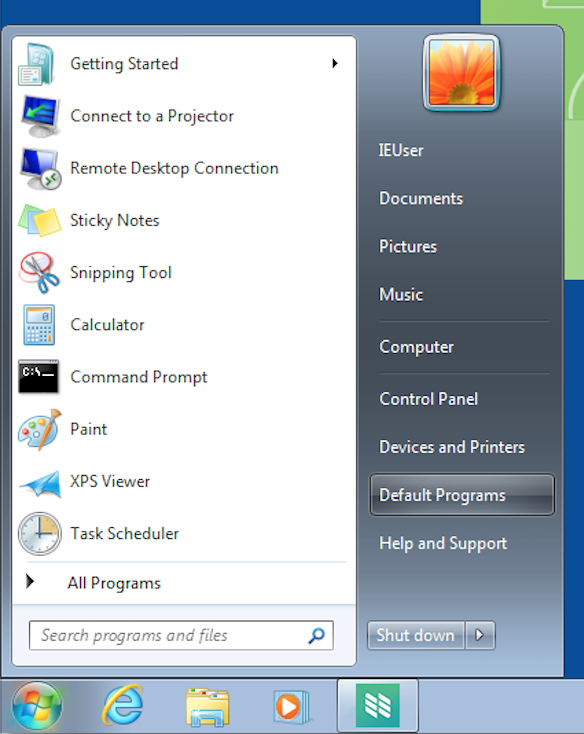
Following the steps above are all you need to do to make Nylas Mail your default mail client. To edit your default mail client after following those instructions, use "Default Programs". You'll find Default Programs" under the Start Menu:
Click "Set your Default Programs" from the list of options:
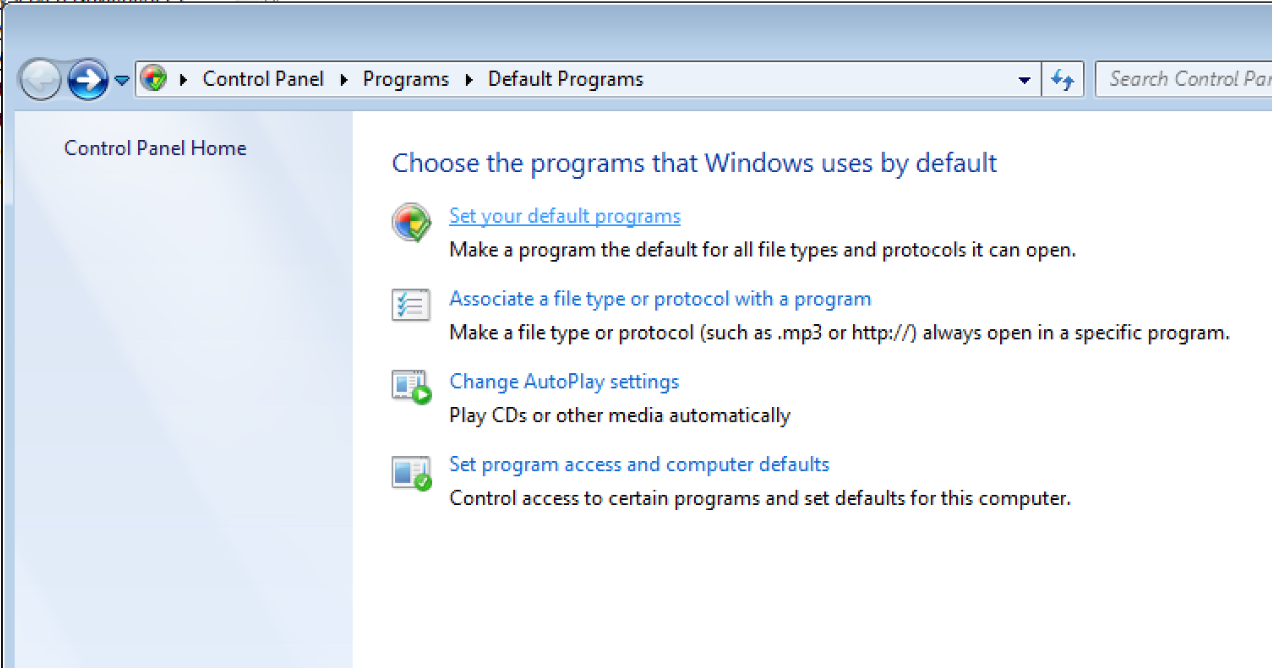
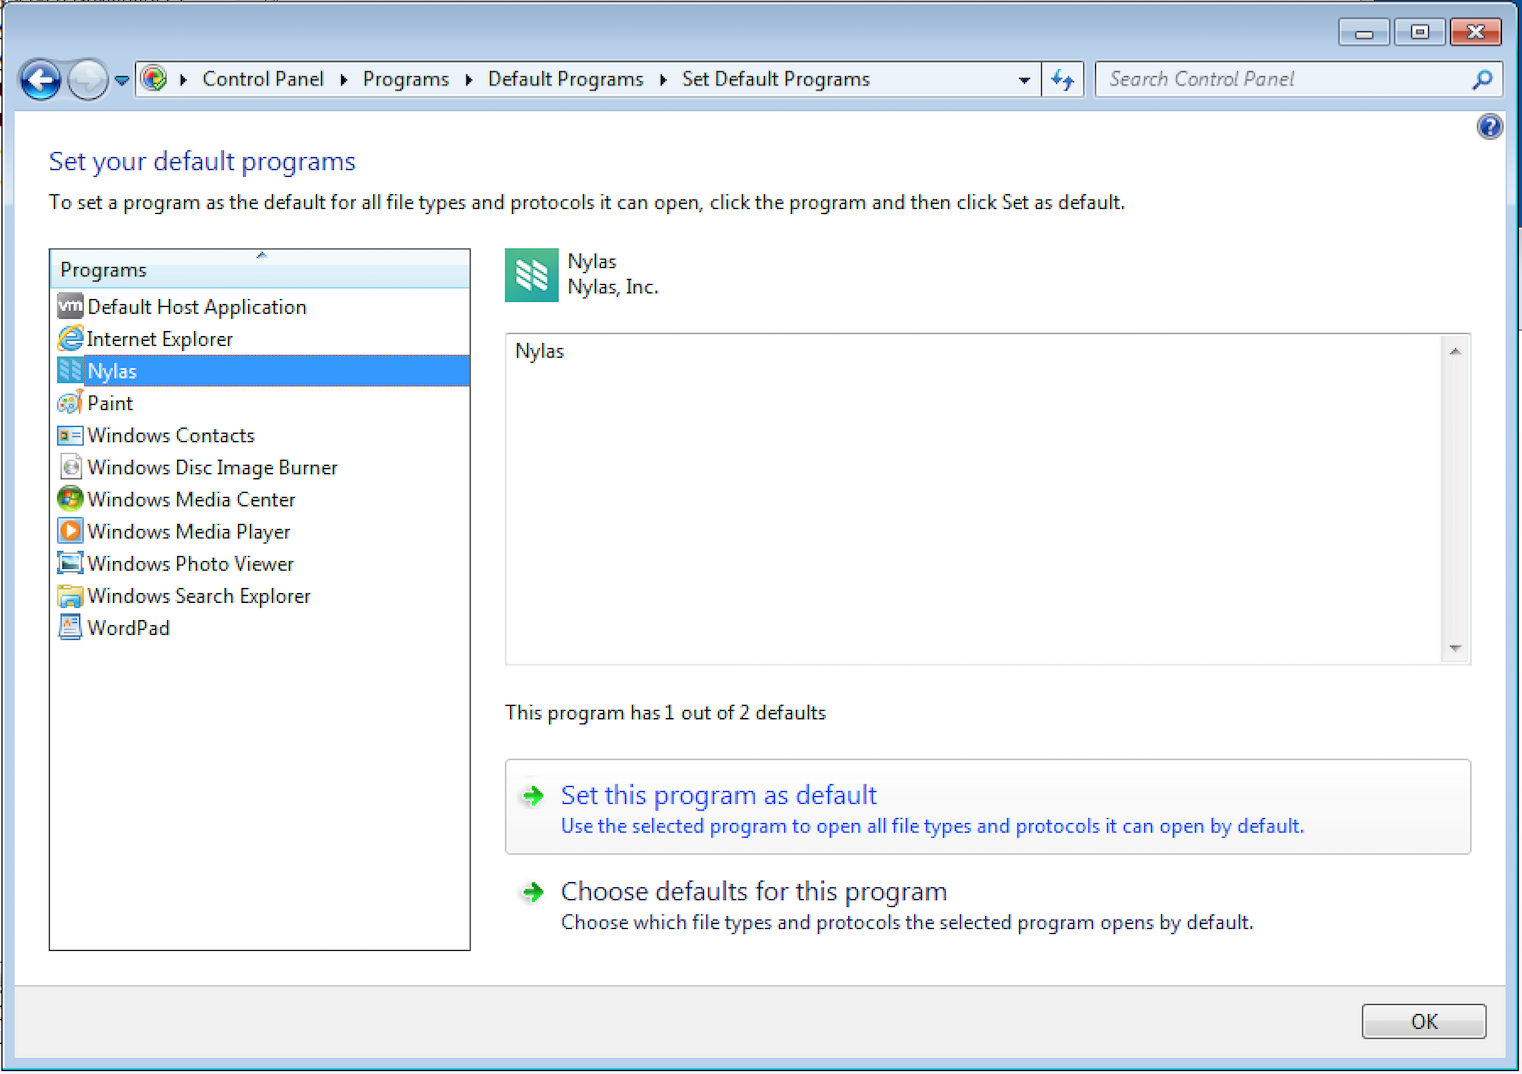
Choose Nylas Mail from the left sidebar, and then click "Set this program as default."
